Add a tenant to the MSSP portal
Add tenants to the multi-tenant portal and optionally provision services and define user access for each tenant.
A user with Super Admin privileges can add tenants to the MSSP portal across multiple regions. For example, they can add a tenant from Europe to the US and vice versa.
Important | We recommend that you Create API only users for your tenant and generate an API token for authenticating to Security Cloud Control. |
Note | If you want to add multiple tenants to the portal, generate API tokens from each tenant and paste them into a text file. You can then add the tenants one after another to the portal without switching to the tenant every time to generate a token. |
Before you begin
Follow these steps to add a tenant to the portal:
Procedure
Step 1 | In the left pane, click Tenants. | ||
Step 2 | Click the | ||
Step 3 | To add a new tenant, click Next.
| ||
Step 4 | Under Tenant Details, enter the Display Name, Tenant Name, and Sales Order Number. Note that tenants created without a sales order number are placed on a 30-day proof-of-value trial. | ||
Step 5 | Click Next. | ||
Step 6 | Under Provisioning,
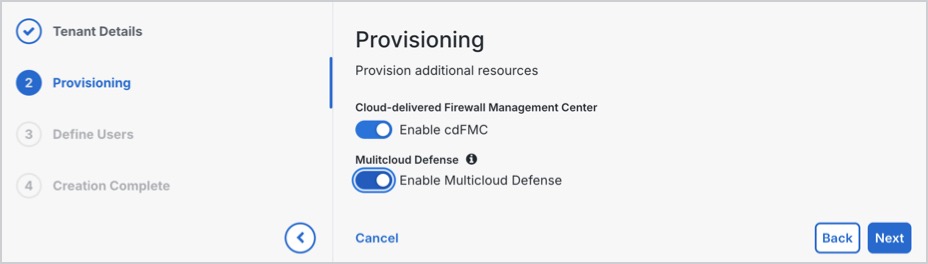
| ||
Step 7 | Under Define Users, either add users manually by entering their email address and selecting their role, or download the CSV file template, fill the necessary details, and upload the file. The added users are displayed in the User list section. | ||
Step 8 | Click Create Tenant. Tenant creation is complete, and provisioning may take a few minutes. |
 icon at the top-right corner of the page.
The tenant is added to the portal. Tenant creation is complete, and provisioning may take a few minutes.